Friday 29 March 2013

Fairytale challenge blog - Giftbags and little wallhangers


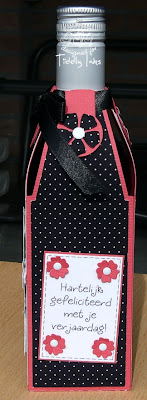
Goedemorgen, vandaag is er weer een nieuwe challenge van het Fairytale challenge blog. De challenge deze keer is om een kleine cadeauverpakking te maken of iets wat je aan de muur kunt hangen. Ik heb ervoor gekozen om een klein flesje wijn te verpakken in een leuk doosje, zodat je een perfect klein cadeautje hebt. Het doosje is ontworpen door mijn moeder! Ik heb het uitgesneden met de silhouette uit strawberry fool cardstock van Elzybells (retired). Daar bovenop heb ik zwart-wit stipjespapier geplakt. De afbeelding die ik op het doosje heb gebruikt is Patriotric Wryn van Tiddly Inks. Ik vond haar ook wel erg leuk voor een verjaardag. Ik heb Wryn ingekleurd met mijn potloden en een zwarte glaze pen. Ik heb Wryn uitgeknipt en daarna met foamtape op het doosje geplakt. Op het vlaggetje en de sterretjes heb ik glitter aangebracht. 

Goodmorning, today a new challenge starts at the Fairytale challenge blog. The challenge this time is to make a giftbag or a little wallhanger. I decided to make a box for a small bottle of wine, a perfect little gift. The box was designed by my mum! I have cut it with the silhouette from strawberry fool cardstock from Elzybells (retired). On top of it I adhered black and white dotted paper. The image I used on the box is Patriotic Wryn from Tiddly Inks. I think she is also perfect for a birthday. I have coloured Wryn with my pencils and a black glaze pen. I have cut Wryn out and adhered her on the box with foamtape. I added glitter on her banner and the little sparkles in her hand. 


Het doosje sluit met een lintje rondom. Ik heb het lintje voorop in een strik gebonden. Op de andere flapjes heb ik bloemetjes geplakt die ik uit het zwart-witte stippenpapier heb geponst met de floral punches van Nellie Snellen. In het midden van de bloemen heb ik een wit hotfix steentje geplakt. 

The box closes with a ribbon that I have wrapped around the bottle. On the front of the box the ribbon is tied into a bow. I have adhered a couple of flowers on the other sides of the box. I punched those out of black and white dotted paper with the floral punches  from Nellie Snellen. I adhered a white hotfix gem in the middle of the flowers.


Op de zijkanten van de doos heb ik een tekst geplakt die ik heb gemaakt op de computer. Rondom de tekst heb ik stiklijntjes getekend met een zwarte fineliner. Het tekstvlak heb ik versierd met 4 bloemetjes die ik heb uitgesneden met de Build-a-flower 3 Embellishment die van Cheery Lynn designs. Ook hier heb ik witte hotfix steentjes midden in de bloemen geplakt.

On the sides of the box I added a sentiment that I made with my computer. Around the sentiment (Happy birthday to you) I added faux stitching with a black pen. I decorated the sentiment panel with a couple of flowers that I cut with the Build-a-flower 3 Embellishment die from Cheery Lynne designs. Here I also added white hotfix gems to the centres of the flowers.


Tuesday 26 March 2013

Tiddly Inks - Wishful pixie


Hallo, hier ben ik weer met een nieuw kaartje. Ik had het de afgelopen dagen even druk met andere dingen, dus ik ben niet echt aan het kaarten maken toegekomen. Vorige week was er weer een kleine nieuwe release van Tiddly Inks en met één van de afbeeldingen heb ik dit kaartje gemaakt. Dit is Wishful pixie van Tiddly Inks. Ik heb haar ingekleurd met mijn potloden en de zwarte glaze pen. Op de roosjes heb ik glitter aangebracht. Ik heb de afbeelding uitgeknipt. Ik heb een roze kaart genomen en daarop heb ik bloemetjes design papier uit het Hello summer paperpad van Echo park geplakt. De tekst komt uit de clear stempelset Sentiment sampler van Paper smooches.

Hello, here I am againa with a new card. I have been really busy with other stuff the past fe days, so I didn't craft at all. Last week we had a new release from Tiddly Inks and I have made this card with one of the images. This is Wishful pixie from Tiddly Inks. I coloured her with my pencils and a black glaze pen. I added glitter on the little roses. I have cut the image out. I have used pink cardstock and I added design paper from the Hello summer paperpad from Echo park. The sentiment is from the clear stampset Sentiment sampler from Paper smooches.

*********************************************************************************
IMAGE: Wishful pixie from Tiddly Inks, Sentiment sampler from Paper smooches
PAPER: Pink and white cs, Hello summer paperpad from Echo Park
INK: Versafine onyx black
ACCESSORIES: Pencils, black glaze pen, black pen, yellow ribbon.

Wednesday 20 March 2013

Creative inspirations - Spring colours


Hallo, hier ben ik met een tweede post vandaag. Ik was bijna vergeten om mijn paastasje te posten hier op mijn blog. Op de een of andere manier dacht ik dat hem morgen moest laten zien, maar dat was dus niet zo.
Deze week ben ik namelijk gast bij het Creative inspirations blog, omdat hun challenge deze week wordt gesponsord door Stampfairy. De challenge is een kleurenchallenge om echte lentekleuren te gebruiken op je projectje. En bij lentekleuren moest ik meteen aan pasen denken, dus ik heb besloten om een klein paastasje te maken met de silhouette.  Het is de 3d egg tote en hij is zo leuk voor pasen! Ik heb het tasje uit gekleurd streepjespapier gesneden en ik heb hem versierd met een ricrac die uit blauw en roze papier is gesneden. Op de ricracs heb ik stiklijntjes getekend met een witte gelpen. Het tasje heb ik versierd met dit schattige konijntje uit de Bunnies easter 3 collectie van Stampfairy. Omdat het de bedoeling was om hele zachte kleurtjes te gebruiken heb ik het konijntje met een hele zachte tint bruin gekleurd. Haar ogen en neus zijn gekleurd met een zwarte glaze pen en daarna heb ik ook nog glossy accents op de neus aangebracht. Het ei heb ik ingekleurd met zachte pastelkleurtjes en daarna heb ik stickles aangebracht. Ik heb het konijn uitgeknipt en met foamtape op het tasje geplakt. Daarna heb ik nog een zacht roze lintje om het tasje gebonden Bovenop het strikje heb ik een blauw stipjesknoopje vastgemaakt.


Hello, here I am with a second post for today. I almost forgot to post this easterbaggie here on my blog. Somehow I thought I was suposed to post it tomorrow, but I was wrong. 
This week I am a guest at the Creative inspirations blog, because Stampfairy is sponsoring their challenge this week. The challenge is a colour challenge and you have to use spring colours on your blog. When I am thinking about spring colours, I have to think about easter, so I decided to make a little easterbaggie with the silhouette. This is the 3d egg tote and it is so lovely for easter! I have cut teh bag iut of striped paper and I decorated it with 2 ricracs that were cut out of blue and pink paper. I added faux stitching on them with a white gelpen. The bag is decorated with a sweet bunnie from the Bunnies easter 3 collection from Stampfairy. Since we had to use soft springcolours I decided to colour the bunny in a light brown colour. I coloured his eyes and nose with a black glaze pen and I applied glossy accents on his nose. I coloured the egg with soft springcolours and then I applied lots of stickles on it. I cut the bunny out and adhered it on the bag with foamtape. I added a pink ribbon and on top of the bow I added a tiny blue dotted button.  


I want to enter my bag in the following challenges:

*********************************************************************************
IMAGE: Bunnies easter 3 from Stampfairy
SILHOUETTE CUTTING FILE: 3d egg tote.
PAPER: White, blue and pink cs
ACCESSORIES: Pencils, black glaze pen, glossy accents, silhouette, white gelpen, pink ribbon, button.

Bombdiggity!

 Goedemorgen, vandaag laat ik twee kaartjes zien uit een kleine serie die ik laatst heb gemaakt. Ik had me voorgenomen om met één stempelset een aantal kaartjes te maken. De stempelset die ik heb gebruikt is BombDiggity van There she goes clearstamps. Uiteindelijk heb ik 4 kaarten met de set gemaakt. Vandaag laat ik de eerste 2 kaartjes zien. 

Goodmorning, today I am showing you 2 cards from a small set of cards. I had decided on a evening that I would take one stampset and make a couple of cards with it. The stampset I used, is BombDiggity from There she goes clearstamps. I ended up with 4 cards and today I am showing you the first 2.


Voor de eerste kaart heb ik het meisje gestempeld en daarna ingekleurd met mijn potloden. Haar ogen zijn gekleurd met een zwarte glaze pen. Op het sterretje op haar jurk heb ik zwarte glitter aangebracht en op de strikjes in haar haar heb ik stickles aangebracht. Ik heb de afbeelding gemaskerd en daarna heb ik de bommen gestempeld. Als laatste heb ik de tekst gestempeld. Uit zwart papier heb ik een randje gestanst met  pinking edge dienamics van My favorite things. Dit vlak heb ik met foamtape op een roze kaart geplakt. Als laatste heb ik 3 zwarte hotfix steentjes opgeplakt.

I stamped the girl for my first card on a sheet of white paper and then I coloured her with my pencils. Her eyes are coloured with a black glaze pen. I used black glitter for the star on her dress. I applied stickles on the bows in her hair. Then I masked the image and stamped the row of bombs. I also stamped the sentiment. I have cut a border from black paper with the pinking edge dienamics die from My favorite things. I have adhered the white paper with foamtape on a pink card. Then I added 3 litte black hotfix gems.


Dan nu het tweede kaartje. Voor dit kaartje heb ik het andere meisje uit de set gestempeld. Ze is weer ingekleurd met potloden, een zwarte glaze pen, stickles en zwarte glitter. Daarna heb ik de afbeelding uitgeknipt. Ik heb een stukje wit papier genomen en daarop heb ik de tekst gestempeld. De letters heb ik ingekleurd met een roze potlood en daarna heb ik er stickles op aangebracht. Daarna heb ik een stukje zwart-wit gestreept washipapier over het witte papier geplakt. ik heb het uiteinde gescheurd en dat ging heel toevallig in een soort vlaggenvorm. ;) Ook onder dit vlak heb ik weer een zwart randje geplakt dat ik heb uitgesneden met de pinking edge dienamic die van My favorite things. Ook dit vlak heb ik met foamtape op een roze kaart geplakt.

Then the second card. On this card I used the other girl from the stampset. She is again coloured with pencils, a black glaze pen, stickles and black glitter. Then I cut the image out. I stamped the sentiment on a sheet of white paper and coloured it with a pink pencil. I applied stickles on the letters. Then I applied a piece of black and white striped washi tape on the white paper. I have torn it and by accident it turned into a bannershape. ;) I added another black edge that I cut with the pinking edge dienamic die from My favorite things. I adhered the white paper on the pink card with foamtape.

I want to enter my card in the following challenges:

*********************************************************************************
IMAGE: BombDiggity from There she goes clearstamps
PAPER: Pink, black and white cs
INK: Versafine onyx black
ACCESSORIES: Pencils, black glaze pen, stickles, black glitter, pinking edge dienamic die from My favorite things, washi tape.

Tuesday 19 March 2013

Tiddly Inks challenge - Anything but a card


Goedemorgen, vandaag begint er weer een nieuwe Tiddly Inks challenge en deze keer willen we geen kaartjes zien, maar iets anders wat je maar kunt bedenken, zoals doosjes, tasjes, tags, boekenleggers etc. Ik vond de challenge erg leuk, maar ik geloof niet dat al mijn teamgenoten daar zo over denken. ;) (Alweer sorry Alyce...). Ik heb ervoor gekozen om een doosje te maken. Ik heb met de silhouette de 3d tall heart gable box uitgesneden, ik heb wel eerst het hartje weggehaald uit het patroon. Voordat ik het doosje in elkaar heb gezet heb ik er eerst een wolkenachtergrond op gemaakt met Tumbled glass distress inkt. Ik heb hiervoor het wolkenpatroontje van Annette gebruikt. Daarna heb ik met mijn potloden een grasrand getekend en wat bloemstengeltjes. Vervolgens heb ik de tekst op het doosje gestempeld. De afbeelding die ik heb gebruikt is Faythe flies van Tiddly Inks. Ik heb Faythe ingekleurd met mijn potloden en voor haar ogen heb ik een zwarte glaze pen gebruikt. Ik heb de afbeelding uitgeknipt en met foamtape op het doosje geplakt. De bloemetjes zijn gemaakt met de Build a flower #3 Embellishment die van Cheery lynn designs. In het midden van de bloemetjes heb ik witte hotfix steentjes geplakt. Daarna heb ik nog een strikje van paars ruitjeslint toegevoegd.


Goodmorning, today a new challenge from Tiddly Inks has started and this time we don't want to see a card, but everything else you can think of, like a tag, a bookmark, a box or a bag. I really enjoyed this challenge, but I don't think all my teamies did like it (Sorry Alyce...again). I decided to make a box. I have cut the 3d tall heart gable box with the silhouette. I have removed the heart from the box. Before I put the box together I made a cloudy background on it with tumbled glass distress ink and the perfect cloudpattern from Annette. Then I have drawn grass and flower stems on the box with my pencils.  Then I stamped the sentiment on the box. The image I used is Faythe flies from Tiddly Inks. I have coloured Faythe with my pencils and I used the black glaze pen on her eyes. I have cut the image out and adhered it on the box with foamtape. The flowers are made with the Build a flower #3 embellishment die from Cheery lynn designs. In the centres of the flowers I adhered tiny whote hotfix gems. Then I added a purple gingham ribbon.


I want to enter my box in the following challenges:

*********************************************************************************
IMAGE: Faythe flies from Tiddly Inks
SILHOUETTE CUTTING FILE: 3d tall heart gable box
PAPER: White cs
INK: Versafine onyx black, tumbled glass distress ink
ACCESSORIES: Pencils, black glaze pen, purple gingham ribbon, Build a flower #3 Embellishment die from Cheery lynn designs, white hotfix.

Monday 18 March 2013

Jubileum kaartje


Goedemorgen, vandaag heb ik nog een jubileumkaartje om te laten zien. Volgens mij had ik het al eerder geschreven, maar er was me gevraagd om een serie kaarten te maken voor het vieren van een jubileum. Dit is er nog één uit de serie. Op dit kaartje heb ik de digitale stempel Sunny patch van Whimsy stamps gebruikt. Ik de heb de afbeelding samen met de tekst geprint. De afbeelding is ingekleurd met mijn potloden. Langs de randen heb ik lijntjes getekend met een zwarte fineliner. Ik heb de afbeelding op geel gestreept papier geplakt en daarna heb ik het geheel op een kraft kaart geplakt. De onderste hoeken van de kaart zijn afgerond met de corner chomper.

Goodmorning, today I have a new jubilee card to show. I think I have written it in another post, but I was asked to make a couple of cards for jubilees and this is one of them. On this card I used the digital stamp Sunny patch from Whimsy stamps. I printed the image together with a sentiment on white paper. I coloured everything with my pencils. I have drawn lines on the dges of the paper with a black pen. I adhered the image on yellow striped paper and then I adhered everything on a kraft card. The bottom corners are rounded with the corner chomper.

I want to enter my card in the following challenges:

*********************************************************************************
IMAGE: Sunny patch from Whimsy stamps
PAPER: Kraft cs, yellow striped paper
ACCESSORIES: Pencils, black pen, corner chomper.

Sunday 17 March 2013

Nog een ruimtekaart


Hallo, ik kon het niet laten om nog een kaartje te maken voor de Ruimte challenge van Casology. Deze afbeelding van de Digistamp boutique is er namelijk perfect voor. Dit is Spaceship Henry. Ik heb de afbeelding samen met de tekst op de kaart geprint. Ik heb het ruimteschip gepaperpieced met rood stippenpapier van het Red devil paperpack van Bazzil basics. Het ruimteschip heb ik nog een keer extra geprint en nadat ik de grijze delen had gekleurd en het raampje met Henry, heb ik deze allemaal uitgeknipt en op de afbeelding geplakt. Daarna heb ik op het raampje glossy accents aangebracht. Op de sterretjes heb ik stickles aangebracht. Als laatste heb ik met een zwarte fineliner een kader rondom de kaart getekend.

Hello. I had to make another card for the Extraterrestrial challenge from Casology. This image from the Digistamp boutique is so perfect for it. This is Spaceship Henry. I printed the image together with the sentiment on the card. I paperpieced the spaceship with red dotted paper from the Red devil paperpack from Bazzil basics. I printed the spaceship and after I had coloured all the silver parts with my pencils, I cut those all out and adhered them on the image. Then I applied glossy accents on the window. On the stars I applied stickles. I added a black frame around the card with a black pen.

I want to enter my card in the following challenges:


*********************************************************************************
IMAGE: Sapceship Henry from the Digistamp boutique
PAPER: White cs, Red devil paperpack from Bazzil basics
ACCESSORIES: Pencils, glossy accents, stickles, black pen.

Friday 15 March 2013

Fairytale challenge - Photo inspration


[

Goedemorgen! Vandaag is het weer tijd voor een nieuwe challenge van het Fairytale challenge blog, waar ik guestdesigner ben de komende 3 maanden. :) Deze keer was de challenge een foto-inspiratie challenge. Eeeek. Dat vind ik meestal niet zo makkelijk. Gelukkig viel het deze keer mee en heb ik mijn laten inspireren door het konijntje en de kleur roze. Ik heb daarom een paaskaartje gemaakt. Op mijn kaart heb ik de stempel Uptown girl Bunny and her Daffodil van Stamping bella gebruikt. Bunny is ingekleurd met potloden en voor haar ogen heb ik een zwarte glaze pen gebruikt. Rondom de afbeelding heb ik gekleurd met blauw krijt. De tekst komt uit de stempelset Forever friends - Easter treats van Docrafts. De afbeelding is behoorlijk groot en dus heb ik hem uitgesneden tot een strip die even hoog is als mijn kaart. Langs de randen heb ik een stiklijntje getekend met een zwarte fineliner. Voor de kaart heb ik Bubblegum karton van Doodlebug gebruikt. Hierop heb ik Sundae stripe design papier van Doodlebug geplakt. De hoeken van de kaart heb ik afgerond met de corner chomper. Als laatste heb ik 2 witte knopen opgeplakt waar ik eerste bubblegum bakers twine doorheen heb gebonden.


Goodmorning! Today it is time for a new challenge on the Fairytale challenge blog, where I am a guestdesigner during 3 months. :) This time the challenge is a photo-inpsiration. Eeeek. I think those are difficult. But I was lucky  and this time was an easy one and I lhave been inspired  by the bunny and all the pink. So I decided to make an easter card. On my card I have used the image Uptown girl Bunny and her daffodil from Stamping bella. Bunny is coloured with pencils and for her eyes I used a black glaze pen. I coloured around the image with blue chalk. The sentiment is from the stampset Forever friends - Easter treats from Docrafts. The image is rather large, so I cut it into a strip with the same heigth as my card. I added faux stitching with a black pen. I have used bubblegum cardstock from Doodlebug on my card. On top of it I adhered Sundae stripe design paper from Doodlebug. I rounded the corners of my card with the corner chomper, Then I added 2 white buttons that I threaded with bubblegum bakers twine.

I want to enter my card in the following challenges: 
*********************************************************************************
IMAGE: Uptown girl bunny and her daffodil from Stamping Bella, Forever friends - Easter treats from Docrafts
PAPER: Bubblegum cs, Sundae stripe from Doodlebug
INK: Versafine onyx black
ACCESSORIES: Pencils, black glaze pen, blue chalk, black pen, corner chomper, white button, bubblegum bakers twine from Doodlebug.

Stampfairy - Mimi dog


Goedemorgen, het is weer tijd voor een nieuwe Stampfairy release. Deze week heeft Gerda de Mimi dog collectie getekend. Ik heb mijn afbeelding ingekleurd met mijn potloden en voor de ogen en neus heb ik een zwarte glaze pen gebruikt. De roze streepjesondergrond heb ik gemaakt met de Weathered stripes stempel van Hero arts en picked raspberry distress inkt. Langs de randen van de streepjes achtergrond heb ik twee zwarte randjes geplakt die ik heb gestanst met de mini scallop edge dienamic die van My favorite things. De tekst is de freebie van de Mimi dog collectie. Ik heb de tekst uitgeponst en daarna heb ik met de silhouette een bijpassende zwarte cirkel uitgesneden. Onder de tekst heb ik nog een strip roze papier geplakt en daarop heb ik vierkante hotfix steentjes geplakt.

Goodmorning, today we have a new Stampfairy release. This week Gerda has drawn the collection Mimi dog. I have coloured the image with my pencils and I used a black glaze pen for the eyes and nose. The pink striped background was made with the Weathered stripes stamp from Hero arts and Picked raspberry distress ink. I added two black strips of paper that were cut with the mini scallop edge dienamic die from My favorite things. The sentiment is the freebie from the Mimi dog collection. I punched it out and added a black scalloped circle that I cut with the silhouette. Under the sentiment I adhered a strip of pink paper and on top of it I added a couple of black hotfix squares.


I want to enter my card in the following challenges:


*********************************************************************************
IMAGE:  Mimi dog from Stampfairy, Weathered stripes from Hero arts.
PAPER: Pink, black and white cs
INK: Picked raspberry distress ink
ACCESSORIES: Pencils, black glaze pen, circle punch, silhouette, mini scalloped border dienamic die from My favorite things, blue chalk.

Thursday 14 March 2013

Blog hop - Unlock the secrets of the hidden tomb

Goedemorgen, vandaag is het zover! Tiddly Inks en Make it crafty hebben weer samengewerkt aan een geweldige nieuwe release en deze vieren we vandaag met een gezamelijke bloghop! En natuurlijk zijn er prijzen te winnen! Alle info hierover staat op het startpunt van de bloghop. Op dat blog staat ook de lijst van alle deelnemers aan de bloghop. Om lekker makkelijk te kunnen hoppen, raden we je aan om het startpunt van de bloghop op een pagina te openen en open daarna via een nieuw tabblad de blogs van de deelnemers. Zo zou het hoppen een beetje makkelijk moeten gaan!

Goodmorning, today is the day! Tiddly inks and Make it crafty have joined together and they have been working on a fabulous new release and today we are celebrating that release with a bloghop! And as usual there are prices to win! All the info about this you can find on the startingpoint of our bloghop. Overthere you wil also find a list with all participants of the hop. To keep this hop simple, we are going to be hopping from the main post HERE and not linking from blog to blog. To make this work, we suggest you open a new window for each link (click CNTRL and the link you wish to visit), which will open the next blog and keep the main post up too...that simple. This way, you can easily navigate between each blog in the hop and return to the main page when you are ready to go to the next blog.


En dan nu over naar het eerste kaartje. Ik moet toegeven dat ik toen ik hoorde dat het thema voor de bloghop egypte was, wel even moest slikken. Het is niet echt mijn soort van afbeeldingen, maar toen ik eenmaal aan de gang was met het voorbereiden van projectjes, kreeg ik er toch veel plezier in.
Op mijn eerste kaartje heb ik gewerkt met de afbeelding Young Cleoptra van Tiddly Inks. De achtergrondstempel is de Desert oasis van Make it crafty. Ik heb beide afbeeldingen ingekleurd met mijn potloden. Na het kleuren en het bekijken van de kaarten van de rest van mijn design team genotes kwam ik erachter dat  er eigenlijk een klein meertje was bedoeld in de oase...oeps niet gezien, dus bij mij is het gewoon één grote zandvlakte. ;) Na het kleuren heb ik de paarse en gouden delen nog eens extra gekleurd met twinkling h2o's, zodat het mooi gaat glanzen, dit is alleen helaas niet te zien op de foto's. Ik heb Cleopatra uitgeknipt en met foamtape op de kaart geplakt.Als basis heb ik een kraftkaart genomen en daarop heb ik de tekst geprint. Ik heb er ook hierofgliefen op geprint. Deze heb ik gemaakt met een gratis font dat ik ergens heb gedownload.

And now onto the first card. I have to admit, that I got a bit scared when I heared the theme of the bloghop. Egyptian girls aren't my kind of images, but when I started working on my projects, I had real fun! 
On the first card I have worked with the image Young Cleopatra from Tiddly Inks. The background image is the Desert oasis from Make it crafty. I have coloured both images with my pencils. After I was done with making my cards and I was looking at the cards my fellow design team mates had made. I realised that I hadn't noticed that there was a lake on the image. I coloured everything like a dessert...oops. After the pencil colouring I went over the pruple and gold parts with twinkling H2O's . It gives a real nice shimmer, but you can't see it on my pictures. I have cut Cleopatra out and adhered her on the card with foamtape. I used kraft cardstock for my card and printed the sentiment on it and also a couple of hieroglyphs. I made those with a free font that I have downloaded somewhere. 


*********************************************************************************
IMAGE: Young Cleopatra from Tiddly Inks, Desert oasis from Make it crafty
PAPER: Kraft paper, black cs
ACCESSORIES: Pencils, black glaze pen, twinkling H2O's.


Mijn tweede projectje is een klein cadeautasje geworden. Het tasje is uitgesneden met de silhouette. De afbeelding die ik op het tasje heb gebruikt is Cleopatra handmaiden van Tiddly Inks. Ik heb Cleo ingekleurd met mijn potloden en de zwart glaze pen. Ik heb de afbeelding uitgeknipt. Voor het tasje heb ik eerst hierogliefen op kraft papier geprint met rode inkt. Nadat ik het tasje had uitgesneden en in elkaar gezet, heb ik twee gaatjes in de bovenkant gemaakt en daar heb ik een jute touwtje doorheen gebonden.


My second project is a little giftbag. The bag was cut with the silhouette. The image I used on the bag is Cleopatra handmaiden van Tiddly inks. I have coloured Cleo with my pencils and a black glaze pen. I have cut the image out. Then I started with printing red hieroglyphs on a sheet of kraft paper. Then I cut the bag with the silhouette. I added 2 holes in the bag and wrapped a jute cord through it.


Cleo's diadeem heb ik versierd met een rood hotfix steentje. Ik heb de diadeem bovendien goud gekleurd met een flesje oogschaduw. ;) Was echt perfect om te gebruiken hiervoor.

I decorated Cleo's tiara with a red hotfix gem. I also decorated the tiara with golden eyeshadow ;) It wqas perfect for this image.

*********************************************************************************
IMAGE: Cleo handmaiden from Tiddly Inks
SILHOUETTE CUTTING FILE: Bag
PAPER: Kraft cs
ACCESSORIES: Pencils, black glaze pen, red hotfix gem, golden eyeshadow.


En dan nu het laatste project van vandaag. Ik heb met de silhouette een melkpakje uitgesneden. Op het melkpakje heb ik de afbeelding Happy mummy day van Tiddly Inks gebruikt. Ik heb de afbeelding heel lichtjes gekleurd met mijn potloden en de zwarte glaze pen. Ik heb de afbeelding uitgeknipt en met foamtape op het melkpakje geplakt. Het melkpakje is uitgesneden uit chocolate brownie cardstock van Elzybells. Daarna heb ik een vel wit printerpapier genomen en dat heb ik in lange repen gescheurd. De papieren stroken heb ik beinkt met chocolate brownie inkt, om ze lekker vies te laten lijken. Daarna heb ik de stroken op het melkpakje geplakt. Gewoon lekker slordig en met scheurtjes erin. :) De tekst heb ik ook op een strip gescheurd papier gestempeld. Deze tekst komt uit de stempelset Sentiment sampler van Paper smooches.

And now onto my last project of today. I have used the silhouette to cut a milk carton. On the milk carton I have used the image Happy mummy day from Tiddly Inks. I have coloured the image with my pencils and a black glaze pen and I adhered it onto the box with foamtape. The box is cut with the silhouette out of chocolate brownie cardstock from Elzybells. Then I took a sheet of printerpaper and I have torn it into long strips. I inked the strips with chocolate brownie ink to make them look dirty. Then I adhered the strips on the milk carton. The sentiment was also stamped on a strip of paper. It is from the Sentiment sampler stampset from Paper smooches.


*********************************************************************************
IMAGE: Happy mummy day from Tiddly Inks, Sentiment sampler from Paper smooches
SILHOUETTE CUTTING FILE: Carton
PAPER: Chocolate brownie cs from Elzybells (retired)
INK: Chcocolate brownie ink from Elzybells (retired)
ACCESSORIES: Pencils, black glaze pen, silhouette, jute cord.

Dan heb ik nu nog één laatste ding om te laten zien. Het symbool hieronder heb je nodig om mee te doen aan de prijsvraag. Hoe je precies kunt meedoen kun je HIER vinden op het blog.

Now I have one last thing to show you. The symbol below is needed for the price. I you want to know how you can enter, you can find it HERE on the blog.


Zo dit was het voor vandaag. Nog veel plezier met hoppen!

That was it for today. Have fun with the rest of the hop!

Wednesday 13 March 2013

Have a MONSTER of a birthday!


Hallo, vandaag heb ik een clean en simpel kaartje om te laten zien. Ik zag namelijk gisteren de nieuwe challenge van Casology and die hebben de challenges om Ruimtekaartjes te maken. Zo'n monster als deze woont volgens mij nergens op de aarde, dus dan moet ie wel uit de ruimte komen toch? ;) Het schattige monstertje is Lil monster's balloon van Annabelle stamps. Ik heb mijn monster volledig gepaperpieced met papiertjes uit het On the bright side paperpad van My mind's eye. UIt hetzelfde design papier heb ik nog 2 banners geknipt. De randen van de banners heb ik bewerkt met vintage photo distress inkt. Ik heb ze op de kaart geplakt. Onder de uiteindes heb ik geen plakband gedaan en deze heb ik een beetje omgekruld. Als laatste heb ik de tekst in de rechter bovenhoek geplakt.

Hello, today I have a clean and simple card to show. Yesterday I saw the new challenge from Casology and they want to see Extraterristrial cards this time. I don't a monster like the one on my card lives somewhere on earth, so he must be from outer space, don't you think so? ;) The cute monster is Lil monster's balloon from Annabelle stamps. I paperpieced the monster with design papers from the On the bright side paperpad from My mind's eye. I also cut two banners from the same design paper. I inked the edges of those banners with vintage photo distress ink and adhered them on the card. I didn't adhere the ends of the banners, because I wanted to curlo those up a bit. The last thing I did was adding the sentiment in the right upper corner.

I want to enter my card in the following challenges:


Tuesday 12 March 2013

Tiddly inks and Make it crafty are going to Egypt!


Oeps deze was ik bijna vergeten te plaatsen op mijn blog, maar goed beter laat dan nooit.... Net zoals in 2011 is er weer een gezamenlijke bloghop van Tiddly inks en Make it crafty. Het thema van de bloghop lijkt me wel duidelijk als je naar de afbeelding kijkt...Hopelijk zie ik jullie dus donderdag voor de bloghop. Alle info over de hop is hier op dit blog te vinden.

Oops I almost forgot to post this on my blog, but better late than never...so here it is! Just like in 2011 we will have a joined bloghop with all the people from Tiddly Inks and Make it crafty. I think you will know what the theme is, especially after seeing this image. So hopefully I will see you all this thursday. You can find all the info on this blog.

Tiddly Inks - Birthday card


Hallo! Vandaag laat ik een verjaardagskaartje zien dat ik heb gemaakt met de digitale stempel Anna Belle Birthday wishes van Tiddly Inks. Deze stempel is ook al clearstempel verkrijgbaar! Anna belle is ingekleurd met mijn potloden en de zwarte glaze pen. Ik heb op de kaarsjes en haar hoedje stickles aangebracht, om de boel nog eens extra feestelijk te maken. Het designpapier dat ik heb gebruikt komt uit het Springtime paperpad van Echo Park. Ik heb met mijn ovalen nestabilities een ovaal uit het streepjespapier gesneden. Van roze papier heb ik daarna een kader voor rondom het ovaal gesneden. Het streepjespapier heb ik verhoogd op de kaart geplakt zodat de afbeelding echt in het ovaal valt en er niet bovenuit steekt. Het roze designpapier heb ik geëmbost met de snowfall embossingfolder. De roze bloemetjes heb ik gemaakt met de Build a flower #2 Embellishment die van Cheerly lynn designs. De takjes heb ik geponst uit groen karton. De tekst komt uit de stempelset Handwritten phrases van Lili of the valley. Ik heb de tekst in een vlaggenvorm geknipt. Onder de tekst heb ik 3 hele kleine pareltjes geplakt. In de bloemetjes heb ik pareltjes geplakt die net één maatje groter zijn.

Hello! Today I am showing you a birthdaycard that I made with the digital stamp Anna Belle Birthday wishes from Tiddly Inks on my card. This stamps is also available as a clear stamp! Anna belle is coloured with my pencils and a black glaze pen. I added stickles on her partyhat and on the candles to make everything a bit more festive. The designpaper I used is from the Springtime paperpad from Echo Park. I have cut an oval with the oval nestabilities out of the striped paper. I added an oval fram that was cut out of pink paper. I adhered the striped paper with foamtape. I embossed the pink design paper with the snowfall embossingfolder. The pink flowers are made with the Build a flower #2 Embellishment die from Cheery lynn designs. I punched the branches out of green cardstock. The sentiment is from the clear stampset Handwritten phrases stampset from Lili of the valley. I have cut into a bannershape. Under the sentiment I added a couple of tiny pearls. I used one size larger pearls to add to the centres of the flowers.


I want to enter my card in the following challenges:

*********************************************************************************
IMAGE: Anna belle birthday wishes from Tiddly Inks, Handwritten phrases from Lili of the valley.
PAPER: Cream and pink cs, Springtime paperpad from Echo Park
INK: Versafine onyx black
ACCESSORIES: Pencils, black glaze pen, stickles, snowfall embossingfoler, oval nestabilities, pearls, branch punch, Build a flower#2 Embellishment from Cheerly lynn designs.


Monday 11 March 2013

Lief klein konijntje...


Goedemorgen, vandaag laat ik mijn eerste paasprojectje van dit jaar zien. Ik heb een klein doosje gemaakt voor een kleine paastractatie. Op het doosje heb ik een hele lieve afbeelding van een konijntje uit de Easter collection 2 van de Digistamp boutique gebruikt. Ik heb de afbeelding ingekleurd met mijn potloden en een zwarte glaze pen. Rondom het konijntje heb ik gekleurd met blauw krijt. Ik heb de afbeelding uitgesneden met de cirkel nestabilities en daarna heb ik wat gedoodled langs de rand van de cirkel met een zwarte fineliner. Met de silhouette heb ik een doosje gesneden uit paars ruitjespapier. Onder de afbeelding heb ik een strip groen papier opgeplakt. Op het groene papier heb ik stiklijntjes getekend met een witte gelpen. Daarna heb ik de groene strip papier nog versierd met een aantal witte hotfix steentjes. 


Goodmorning, today I am showing you my first easter project from this year. I made a little box for a nice easter treat. On the box I used an image of a very sweet bunny from the Easter 2 collection from the Digistamp boutique. I have coloured the image with my pencils and a black glaze pen. I coloured around the bunny with blue chalk. I have cut the image out with the circle nestabilities and I doodled on the edge of the circle with a black pen. I have cut a box from purple gingham paper with the silhouette. Under the image I added a strip of green paper. I decorated it with drawing faux stitching on it with a white gelpen and after I added the circle on the box I adhered a couple of white hotfix gems on the green strip.


I want to enter my box in the following challenges:

*********************************************************************************
IMAGE: Easter 2 collection from the Digistamp boutique
PAPER: Purple gingham paper, white and green cs
ACCESSORIES: Pencils, black glaze pen, blue chalk, black pen, circle nestabilities, white gelpen, white hotfix.

Sunday 10 March 2013

Verjaardagskaartje


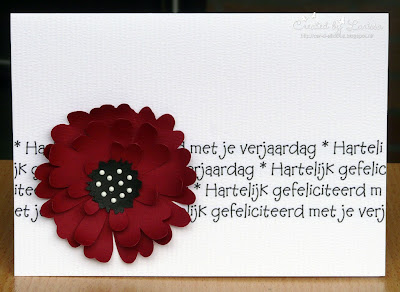
Hallo, vandaag laat ik een simpel verjaardagskaartje zien dat ik heb gemaakt. Ik ben begonnen met het printen van de tekst op een witte kaart. Daarna heb ik met de silhouette de Marigold uitgesneden uit donkerrood en zwart papier. Ik heb de blaadjes van de bloem een beetje opgekruld met het uiteinde van een penseeltje. Nadat ik de bloem in elkaar heb gezet en op de kaart heb geplakt, heb ik in het zwarte midden van de bloem een aantal witte hotfix steentjes geplakt.

Hello, today I am showing you a simple birthday card that I made this weekend. I started with printing the sentiment (Happy birthday to you) on a white card. Then I used the silhouette to cut the Marigold out of dark red and black paper. I curled the leaves of the flowers with the end of a brush. After I glued the flower together, I added a couple of white hotfix gems in the centre of the flower.

I want to enter my card in the following challenges:
*********************************************************************************

SILHOUETTE CUTTING FILE: Marigold

PAPER: White cs, dark red and black papicolor paper
ACCESSORIES: White hotfix, silhouette.

Friday 8 March 2013

Cadeautje


Hallo, vandaag laat ik eerns wat anders dan een kaartje of doosje zien. Ik had afgelopen week een verjaardag en wilde mijn cadeau op een leuke manier verpakken en het leek me daarom leuk om op mijn inpakpapier te stempelen. Anders was het maar een saai roze papiertje. Ik heb een stuk papier genomen en daarop heb ik gestempeld met afbeeldingen uit de set Flower arrangement van Clearly besotted stamps. Ik heb een bloemetje, een blaadje en een stip gebruikt en deze overal op het papier gestempeld. Ik heb een tekst uit de stempelset Eline's words van Marianne design gestempeld op wit papier en deze heb ik daarna uitgesneden met de cirkel nestabilities. Ik heb onder de tekst nog een bloemetje en 2 blaadjes gestempeld en daarna heb ik een stiklijntje langs de rand van de cirkel getekend. Ik heb nog een zwarte scalloped cirkel toegevoegd. In het midden van het bloemetje heb ik een roze hotfix steentje geplakt. Daarna heb ik een lintje onder de cirkel geplakt en vervolgens heb ik het geheel op het pakje geplakt.

Hello, today I am  showing you something else than a card or a box. I had a birthday last week and wanted to wrap my present in a original wat. So I thought that I would stamp on my pink wrapping paper, that was looking rather dull without anything on it. I took some of the wrapping paper and stamped on it with some stamps of the stampset Flower arrangement from Clearly besotted stamps. I used a flower, a leaf and a big dot and stamped them randomly on the paper. Then I stamped a sentiment (Happy birthday to you) from the stampset Eline's words from Marianne design on white paper. I cut the sentiment out with the circle nestabilities and added another flower and some leaves. I also added faux stitching with a black pen. Under the circles I added a black ribbon and in the centre of the flower I adhered a pink hotfix gem. 


*********************************************************************************
IMAGE: Flower arrangement from Clearly besotted stamps, Eline's words from Marianne design

PAPER: Pink wrapping paper, white and black cs.
INK: Versfine onyx black
ACCESSORIES: Circle nestabilities, pink hotfix, black pen, black ribbon.

Wednesday 6 March 2013

ABC christmas - E = Eyes down for a bingo


Goedemorgen, vandaag mag ik voor Stampfairy guestdesigner zijn bij het ABC christmas challenge blog, omdat hun challenge deze keer wordt gesponsord door Stampfairy. De challenge deze keer is een bingo. Ik heb voor de onderste rij gekozen en dus heb ik een lint, een dier en diecuts op mijn kaart gebruikt. 
Ik heb gewerkt met een afbeelding uit de Al - Welcome winter collectie van Stampfairy. Al is ingekleurd met mijn potloden en voor zijn ogen heb ik een zwarte glaze pen gebruikt. Ik heb de afbeelding uitgeknipt en op cirkels geplakt die ik met mijn nestabilities heb uitgesneden. Op de witte cirkel heb ik een stiklijntje getekend met een zwarte fineliner en ook heb ik stipjes gemaakt met stickles. Als basis heb ik een rode kaart genomen en daarop heb ik zwart-wit ruitjes papier geplakt. De rode strip heb ik gesneden met de Wonky scallop dienamic die van My favorite things. Ik heb er een wit lintje omheen gebonden. De tekst komt uit de Greetings postmarks stempelset van Lili of the valley. Ik heb de tekst op rood papier gestempeld en daarna uitgeponst. Ik heb een wit stiklijntje toegevoegd en een hartje dat ik heb uitgesneden met de Mini hearts set van Simon says stamp. Ik heb stickles aangebracht op het hartje.  


Goodmorning, today I am a guestdesigner at the ABC christmas challenge blog, because Stampfairy is sponsoring their challenge this time. The challenge this week is a bingo, I decided to go for the bottom row with  a ribbon, an animal and diecuts.
I have used an image from the Al - Welcome winter collection from Stampfairy on my card. Al is coloured with my pencils and I used the black glaze pen for his eyes. I have cut the image out and adhered it on a couple of circles that I cut with my nesties. On the white circle I added faux stitching with a black pen and I made some dots with stickles. I used a red card and added a layer of black and white gingham paper. The red strip is cut with the wonky scallop border dienamic from My favorite things. I wrapped a white ribbon around it. The sentiment is from the Greetings postmarks stampset from Lili of the valley. I stamped it on red paper and added faux stitching with a white gelpen. The little heart was cut with the Mini hearts set from Simon says stamp. I added stickles on the heart. 

I want to enter my card in the following challenges:

*********************************************************************************
IMAGE: Al - Welcome winter from Stampfairy, Greetings postmarks from Lili of the valley.
PAPER: Red , black and white cs
INK: Versafine onyx black
ACCESSORIES: Pencils, black glaze pen, stickles, circle nestabilities, wonky scallop dienamic die from My favorite things, circle punch, white ribbon, Mini hearts set from Simon says stamp, black pen.

LinkWithin

Related Posts with Thumbnails