Saturday 31 July 2010

Mijn kaartjes uit HJ 65

Hallo! Ook deze maand mocht ik weer 2 kaartjes maken voor de nieuwe Hobbyjournaal 65 en vandaag zal ik de kaartjes even laten zien.

Hello! This month I was asked again to make 2 cards for the Dutch kraft magazine Hobbyjournaal and today I am posting my cards.

Het eerste kaartje is gemaakt met deze superlieve afbeelding van Tiddly Inks. Daddy's girl is geprint op het whipped cream cardstock van Elzybells en daarna heb ik haar ingekleurd met mijn potloden. Haar ogen heb ik nog eens extra gekleurd met een zwarte glaze pen. Het bruine ruitjes papier is een digitale download van Pink petticoat: Little check en ook dit heb ik op het whipped cream cardstock van Elzybells geprint. Over de kaart heb ik een strip chocolate brownie cardstock geplakt en daar bovenop zit weer een strip whipped cream cardstock. Langs de randen van het bruine cardstock heb ik met een witte gelpen stiklijntjes getekend. Op de witte strip heb ik twee rose knoopjes geplakt en daar heb ik eerst een strikje in gemaakt met witte wol. Onder de afbeelding uit heb ik twee lusjes gehangen die ik gemaakt heb mnet rose grosgrain lint. 

The first card was made with this supersweet image from Tiddly Inks. Daddy's girl is printed on whipped cream cardstock from Elzybells and then I coloured her with my pencils. Her eyes are coloured with a black glaze pen. The brown patterned paper is a download from Pink Petticoat: Little check and I printed it on the whipped cream cardstock from Elzybells. I have placed a strip of chcolate brownie cardstock from Elzybells on my card and on top of that I added a strip of whipped cream cardstock. I used a white gelpen to draw the faux stitching on the edges of the brown cardstock. I added 2 pink buttons on the white strip. Under the image I have added 2 pieces of pink grosgrain ribbon.

IMAGE: Daddy's girl from Tiddly Inks, Little checks from Pink Petticoat
PAPER: Whipped cream and chocolate brwonie cardstock from Elzybells.
ACCESSORIES: Pencils, black glaze pen, white gelpen, pink grosgrain ribbon, pink buttons, white cord.

 
De tweede kaart is gemaakt met een mooie bloemenstempel Floral spray van Hobbyartstamps. Ik heb de tak direct op de kaart gestempeld en daarna ingekleurd met mijn potloden. Binnenin in de kaart heb ik tegen de middenvouw aan de tekst geprint en daarna heb ik precies uitgemeten waar ik op de voorkant de rechthoek uit de kaart kon snijden met de deckled nestabilities. Door het gat heb ik een groot rose lint gedaan en daar heb ik een grote knoop in gemaakt. 
 
The second card was made with the lovely flowerstamp Floral spray from Hobbyartstamps. I stamped the image on the card and coloured it with my pencils. On the inside of the card I printed the sentiment (Congratulations) next to the fold of the card. Then I measured on the outside of the card where to put the deckled rectangle nestabilitie, so the text would show through the hole after I cut it.  I added a pink ribbon and tied it in a knot.
 
IMAGE: Floral spray FL2022LD from Hobbyartstamps.
PAPER: White cs from stash
INK: Versafine onyx black
ACCESSORIES: Pencils, pink ribbon, deckled rectangle nestabilities.

Friday 30 July 2010

DU2DS 43 - Donna's sketch


Goedemorgen allemaal. Vandaag begint de nieuwe challenge weer van Dare U 2 Digi Stamp en deze week hebben we een geweldige sketch van Donna! Ik heb ervoor gekozen om een heel zomers kaartje te maken met kleuren die ik normaal eigenlijk niet zo snel samen gebruik. Het lieve kikkertje op mijn kaart is een digitale stempel van Bugaboo en dit is Beach frog summer treats. Ik heb het kikkertje gekleurd met derwent potloden en de ogen heb ik gekleurd met een zwarte glaze pen. Ik heb de afbeelding uitgesneden met mijn nestabilities en langs de rand heb ik een stiklijntje getekend met een oranje fineliner. Het vrolijke stipjespapier komt uit de Baby safari collectie van Little yellow bicycle and dit is de Girl small dots. Ik heb het oranje papier geëmbost met de spots and dots embossing folder van cuttlebug. De gele strip papier is geponst met de dotted scallop pons van EK succes. De tekst komt uit een stempelset van Papermania.

Goodmorning everyone. Today the new challenge starts on the Dare U 2 Digi stamp challenge blog and this week we have a fabulous sketch from Donna! I have made a real summer card with really sunny colours that I normally don't use together. The cute little frog is a digital stamp from Bugaboo and this is Beach frogs summer treats and I coloured it with my derwent pencils and the eyes were coloured with a black glaze pen. I have cut the image out with my nestabilities and added faux stitching on the edges with an orange fineliner. The sunny dotted paper is from the Baby Safari collection from Little yellow bicycle and this is girl small dots. I have embossed the ornage paper with the spots and dots embossing folder from cuttlebug. The yellow strip of paper was punched with the dotted scallop punch from EK Succes. The sentiment is a from a papermania stamp set.

IMAGE: Beach frog Summer treats from Bugaboo and Clare Curd's sentiments from Papermania
PAPER: Girl small dots from the Baby safari collection from Little yellow bicycle
INK: Versafine onyx black
ACCESSORIES: Derwent pencils, back glaze pen, white gelpen, orange fineliner, rectangle nestabilities, spots and dots embossing folder from cuttlebug, dotted scallop punch from EK succes, white ribbon, corner chomper.

Thursday 29 July 2010

Softpencil - Molly in spring


Goedeavond allemaal.Ik ben een beetja laat met mijn Softpencil kaartje posten, want ik had de afgelopen dagen een migraine aanval en ik lag dus in bed. Gelukkig wordt het nu al beter. Vandaag is het weer tijd voor een Softpencil kaartje en deze week moesten we de afbeelding Molly in spring gebruiken. Ik heb Molly gekleurd met mijn derwent potloden en met blauwe chalk en een zelfgeknipte mal heb ik een wolkenachtergrond achter Molly gemaakt. Molly's ogen zijn gekleurd met een zwarte glaze pen. Ik heb de afbeelding uitgesneden met de rechthoekige nestabilities. De losse insecten komen uit de bichitos set van Softpencil. Ook deze zijn gekleurd met derwent potloden en daarna heb ik ze uitgesneden met de ronde nestabilities. Als basis heb ik een donkerblauwe kaart gebruikt en daarop heb ik een lichtblauw gestreepte achtergrond geplakt. Op de donkerblauwe strip papier heb ik met een witte gelpen stiklijntjes getekend.

Goodevening everyone! I am a little late with my Softpencil post, because I have had a migraine the last days and so I was trying to sleep a bit. Luckily I am starting to feel better now. Today it is time again for a new Softpencil card and this week the design team had to use the image Molly in spring. I have coloured Molly woith my derwent pencils and with blue chalk and a cloud pattern, that I made myself, I have added some clouds behind Molly. Molly's eyes are coloured with a black glaze pen. I have cut the image out with the rectangle nestabilities. The little insects sare from the Bichitos set from Softpencil. I coloured these also with my derwent pencils and then I cut them out with the circle nestabilities. I used a darkblue card as my base and added a light blue striped background. I used a white gelpen for the faux stitching on the dark blue strip of paper.

IMAGE: Molly in spring and Bichitos-set from Softpencil
PAPER: Darkblue cs from Wibra
ACCESSORIES: Derwent pencils, black glaze pen, blue chalk, circle nestabilities, white gelpen

Tuesday 27 July 2010

Tiddly Inks 15 - Fit for a princess


Goedemorgen! Het is weer tijd voor een nieuwe Tiddly Inks challenge en deze week willen we graag een prinses op je kaartje zien. In de Tiddly Inks shop zijn een aantal geweldige prinsesjes te vinden, maar ik wilde iets anders doen en dus heb ik de afbeelding Queen of the castle gebruikt. Dit lieve prinsesje is net klaar met het bouwen van haar zandkasteel en ze hoeft alleen nog maar de vlag te plaatsen. Ik heb het zandkasteel apart geprint en nadat ik de afbeelding had gekleurd met derwent potloden heb ik de afbeelding uitgesneden met de rechthoekige nestabilities. Ik heb wolkjes geknipt uit een los velletje papier en daarna heb ik met blauwe chalk wolkjes getekend rondom het zandkasteel. Het meisje heb ik op een apart stukje papier geprint en na het inkleuren heb ik haar uitgeknipt. Haar ogen heb ik gekleurd met een zwarte glaze pen en haar badpak heb ik gekleurd met een clear spica glitter pen. De kaart heb ikgemaakt van Kraft cardstock van Elzybells en daarop heb ik een laag White wash cardstock van Core'dinations geplakt. Ik heb dit eerst geëmbost met dots embossing folder van Crafts-too. Deze embossingmal is vierkant en dus moest ik hem hebben! :) Ik heb de stippen geschuurd zodat de bruine kleur er doorheen kwam. Met een bruine fineliner heb ik streepjeslijnen gezet op een stuk kraft cardstock en onderaan heb ik de tekst gestempeld met Chocolate brownie inkt van Elzybells. Ik heb er een lintje rondom heen gebonden.Ik heb de retro ponsen gebruikt om de bloemen uit te ponsen uit kraft cardstock en daarna heb ik er streepjes op getekend met de bruine fineliner.

Goodmorning! It is time again for a new Tiddly Inks challenge and this week we want to see a princess on your card. You can find a couple of very awesome princess images in the Tiddly inks shop, but I decided I wanted to use another image and so I have used the image: Queen of the castle. This sweet little princes just finished building her sand castle en now she wants to place her flag on top of the castle. I printed the sandcastle on a piece of paper and after I coloured it, I cut ot out with the rectangle nestabilities. I used blue chalk to colour the clouds around the image. I cut those clouds out of a piece of paper. I printed the girl on seperate piece of paper and after I coloured her, I cut her out. Her eyes were coloured with the black glaze pen and her clothes were coloured with the clear spica glitter pen. The card was made from kraft cardstock from Elzybells and I added a layer of Core'dinations white wash paper. I embossed it with the square (!) dots embossingfolder from Crafts-too and then I sanded it, so the brown colour would show up. I added faux stitching to the kraft rectanfgle with a brown fineliner and stamped the sentiment on it with Chocolate brownie ink from Elzybells. I added a cream ribbon. I used the retro punches to punch the flowers and i have drawn faux stitching on them with a brown fineliner.

IMAGE: Queen of the castle from Tiddly Inks, Clare Curd's sentiments from Papermania
PAPER: Core'dinations white wash Grandpa's trunk, kraft paper from Elzybells
INK: Chocolate brownie ink from Elzybells
ACCESSORIES: Derwent pencils, black glaze pen, brown fineliner, clear spica glitter pen, rectangle nestabilities, cream ribbon, retro punches, dots embossing folder from Crafts-too, blue chalk

Sunday 25 July 2010

Meljen's design - Verjaardagskaartje

Hallo allemaal! Dit kaartje heb ik vandaag gemaakt met een digitale stempel van Meljen's designs. Ik heb de zonnebloem geprint en daarna ingekleurd met derwent potloden. Rondom de zonnebloem heb ik gekleurd met blauwe chalk. Uit een stuk geel linnen papier waarop ik de tekst heb geprint, heb ik met mijn nestabilities een ovaal gesneden. Langs de randen van het rechthoek heb ik streepjeslijnen gezet met een zwarte fineliner. Het gele vlak is versierd met zwarte hotfixjes en ik heb een touwtje om het kader gebonden. Onder de afbeelding zit nog een vlak met gele stippen en daar rondom heb ik ook een streepjeslijn getekend met de zwarte fineliner.


Hi everyone! I made this card today with a digital stamp from Meljen's design. I have printed the sunflower and coloured it with derwent pencils. I have coloured around the image with blue chalk. I have pprinted the sentiment (congratulations) on a piece of yellow paper and cut an oval out it with my nestabilities. On the edges of the yellow paper I have drawn faux stitching lines with a black fineliner and I added a couple of black hotfix stones. I made a little bow with some white cord. Under the image I added some yellow dotted paper and I did ssome more faux stitching with a black fineliner.


IMAGE: Sunflower buggies from Meljen's design available at Whimsy stamps
PAPER: Yellow linen structure cs, white dcp
ACCESSORIES: Derwent pencils, black fineliner, oval nestabilities, black hotfix, white cord.

Thursday 22 July 2010

Tiddly Inks - Halloween in July bloghop

Goedemiddag! Vandaag is het eindelijk zover want vandaag is de Tiddly Inks Halloween in july bloghop. All details van de bloghop staan hieronder.

Hello! Today is finally the day, because today is the Tiddly Inks Halloween in july bloghop. I will copy all the details of bloghop over here.

1) Make your card ahead of time and post it your blog (I plan to schedule mine for 7/22/2010 at 12 PM CST).

2) After it is live on your blog, go to the challenge blog and paste your URL/blog address in the Inlinkz box (our blog post will be up at 12 PM CST).
3) Wait until 6 PM when we close the Inlinkz list, and then come back here and visit all the entries in the Inlinkz list. When you click on each entry, it should open a new window with the blogger's card and entry...kinda cool, huh? It means we don't have to direct you to the next blog.... just stay on the challenge blog to keep "hopping" around the entries.
4) Hop around and visit the cards. :)
Ik heb voor de bloghop 3 kaarten gemaakt met drie van de nieuwe afbeeldingen uit de Tiddly Inks shop. Tijdens de bloghop zijn leuke prijsjes winnen, zoals een tegoed van 10 dollar voor de Tiddly Inks shop voor een willekeurig persoon die een reactie achterlaat en voor de deelnemers aan de bloghop is er een guestdesigner spot te winnen! Woohoo.

I made 3 cards for the bloghop with 3 of the newest images from the Tiddly Inks shop. You can win great prices during the bloghop: A random commentor will win a credit of 10 dollars for the Tiddly Inks store and one of the bloghoppers can win a guestdesigner spot in the Tiddly Inks design team! Woohoo!! 

Ok hier is dan mijn eerste kaartje en op deze kaart heb ik de afbeelding Vamp-boto gebruikt. Is het niet een superlief vampieren robotje? Ik heb vamboto gekleurd met mijn derwent potloden en daarna heb ik hem uitgeknipt. De ogen van de robot zijn gekleurd met de zwarte glaze pen. Langs de rand van de cirkels die ik heb uitgesneden met de nestabilities heb ik met een zwarte fineliner een stiklijntje gezet. De vleermuis krijg je tegelijk met vamboto en ik heb hem vier keer geprint en gekleurd. De tekst Boo is gemaakt met het Olivia alfabet van quickutz.

Ok here is my first card and on this card I used the image Vamp-boto. Isn't this the cutest robot vampire? I have coloured Vamboto with my derwent pencils and then I cut him out. I coloured his eyes with a blsck glaze pen. I doodled a faux stitching line on the edge of the circle that was cut out with the circle nestabilities. Ypu get the bat together with the image Vamboto. I printed them 4 times and coloured them. The sentiment boo was made with the Olivia alphabet from quickutz.


Op mijn tweede kaart heb ik de afbeelding Candy avenger gebruikt. Ook deze keer heb ik weer gekleurd met mijn derwent potloden. Ik heb rondom de afbeelding gekleurd met grijze en zwarte chalk om het extra spooky te maken. :) Ik heb de afbeelding uitgesneden met de vierkante nestabilities en ook hier heb ik weer een stiklijntje getekend. Op oranje karton heb ik zwarte stippen geprint en ik heb 2 lintje erom heen gebonden. De tekst is geprint en daarna geponst met de stampin up word window punch. Langs de rand heb ik weer een stiklijntje gezet met een zwarte fineliner.

On my second card I used the image Candy avenger. This time I also coloured with my derwent pencils. I coloured with grey and black chalk around the image to create a spokky character. :) I have cut the image out with the square nestabilities and I added a faux stitching line. I printed black dots on the orange paper and added two black ribbons. The sentiment was printed and I punched it out with the stampin up word window punch. I doodled on the edge with a black fineliner.


De derde kaart is gemaakt met Batty bug. Ik heb Batty gekleurd met derwent potloden en daarna uitgeknipt. Ik heb een sketch van de Clean and simple blog gebruikt om mijn kaartje te maken. Op een zwarte kaart heb ik eerst een laag pink lemonade cardstock geplakt en daaroverheen zit een laag black magic Core'dinations papier. Ik heb dit stuk eerst geëmbossed met de diamonds embossing folder van quickutz en daarna heb ik het geschuurd met een nagelvijl. Ik heb nog een vlak van het pink lemonade cardstock uitgesneden en ik heb één rand geponst met de scallop sentiment pons van Fiskars. Om het rose cardstock heb ik een zwart lintje gebonden. De tekst is geprint en daarna geponst met de Stampin up word window pons.

The thirth card was made with the image Batty bugg. I have coloured Batty wth my derwent pencils and then I cut her out. I used a layout from the Clean and simple blog to create my card. On a black card I first added a layer of pink lemonade cs from Elzybells and on top of that I added a layer of black magic Core'dinations cs. I embossed the black paper with the diamonds embossingfolder from quickutz and sanded it with a nail file. I cut another piece of the pink lemonade cs and punched one side with the scallop sentiment punch from Fiskars. I added a black ribbon. The sentiment was printed and then I punched it with the Stampin Up word window punch.

*********************************************

Vamboto card:
PAPER: Red and black papicolor.
ACCESSORIES: Derwent pencils, black glaze pen, black and white fineliner, circle nestabilities, Olivia alphabet from quickutz

Candy avenger:
IMAGE: Candy avenger from Tiddly InksPAPER: Black cs with linen structure, orange cs from stash
ACCESSORIES: Derwent pencils, grey chalk, black glaze pen, black ribbon, stampin up word window punch, square nestabilities, black fineliner

Batty bugg:
PAPER: Pink lemonade cs from Elzybells, black magic core'dinations cs, black cs
ACCESSORIES: Derwent pencils, diamonds embossing folder from quickutz, scallop sentiment punch from fiskars, black ribbon, stampin up word window punch.

Softpencil - Thinking of you (digi sentiment)


Goedemorgen allemaal! Het is weer donderdag en dat betekent dat het tijd is voor een Softpencil kaartje. Deze week moest het design team aan de gang met één van de digi sentiments. Ik heb de afbeelding erbij gekleurd met derwent potloden en daarna de afbeelding uitgesneden. Op een witte kaart heb ik een vlak bloemetjes papier geplakt. Dit is een digitale download van Pink petticoat en de set heet daisy bouquet. In het midden heb ik een strip wit papier geplakt onder deze strip zit zwart papier en daar heb ik een schulprandje aan geknipt met een figuurschaar. Langs de randen van de witte strip papier en het rose papier heb ik met een zwarte fineliner een stiklijntje getekend. Als laatste heb ik een zwart-wit geruite strik toegevoegd.

Goodmorning everyone! It is Thursday again and that means it is time for a Softpencil card. This week the design team had to work with the Thinking of you digi sentiment. I have coloured the girl with derwent pencils and then I cut the image out. On a white card I added a layer of pink flower paper. It is from Pink petticoat and it is from the set Daisy bouquet. In the middle of the card I added a strip of white paper. I also added a layer of black paper that was cut with scissors to create the scallop border. I added a faux stitching with a black fineliner. I also added a black and white gingham ribbon.

**************************************************

IMAGE: Digi sentiment thinking of you from Softpencil
PAPER: Daisy bouquet from Pink petticoat
ACCESSORIES: Derwent pencils, black fineliner, black and white gingham ribbon, shaped scissors.

**************************************************

Vergeet niet later vandaag nog hier terug te komen, want vandaag is de Tiddly inks Halloween in July bloghop.

Don't forget to come back later tiday, because today is the Tiddly Inks Halloween in July bloghop.

Wednesday 21 July 2010

Tuesday morning sketches - Changito with flowers


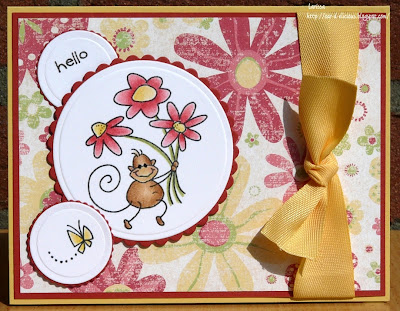
Goedemorgen! Een tijdje geleden heb ik een cardkit van mijn vriendin Angela gewonnen en gisteren lag mijn cardkit in de brievenbus. Angela en ik zijn beide erg gek op stempels van dit lieve aapje Changito, dus ik was dan ook erg blij met deze stempelafdrukjes en het heerlijke zomerse dp dat ze in de cardkit had gedaan. Ik ben dan ook meteen aan de slag gegaan en ik heb er alvast een eerste kaartje mee gemaakt. Met het kaartje doe ik meteen aan het verjaardagsfeestje van de Tuesday morning sketchers, want hun blog bestaat deze maan één jaar en dat vieren ze een maand lang. Je mocht zelf uitkiezen uit al hun sketches welke je wil gebruiken voor je kaartje en dan moest je er ook nog een zomers tintje aan geven. Ik heb gekozen voor sketch 30. Ik heb alleen de rechthoeken vervangen door cirkels.

Op de gele kaart (So saffron cs van Stampin up heb ik eerst een laag Ruby Red cs van Stampin up geplakt en daarop heb ik het vrolijke dp van The paper studio geplakt. Van het gele lint heb ik een grote strik gemaakt. De afbeelding Changito spring heb ik gekleurd met derwent potloden en de ogen van Changito heb ik gekleurd met een zwarte glaze pen. De afbeelding heb ik daarna uitgesneden met de cirkel nestabilities. Het afdrukje van het vlindertje zat ook in de kit en de tekst heb ik zelf gestempeld met de everyday add ons stempelset van Elzybells.

Goodmorning! A while ago I won a cardkit from my friend Angela en yesterday I found the kit in my mailbox. Angela and I both love the images of Changito the monkey from Stampendous very much, so I was really happy with the stamped images that were in the kit and the lovely dp she added!  So I had to start immediately on a first card. I made a card for tyhe birthday party of the Tuesday morning sketchers. Their blog turned one this month and they are celebrating the whole month. You are allowed to use which sketch of them you are going to use and make a summer card. I have chosen to use sketch 30 and I replaced the rectangles by circles.

On the yellow card (So saffrom from Stampin up) I added a layer of Red ruby cs from Stampin up and then I added a layer of the lovely dp from The paper studio . I made a big bow from the yellow ribbon. The image is Changito spring and I coloured it with my pencils. His eyes were coloured with a black glaze pen. The image was cut out with the circle nestabilities. The imgae of the butterfly is also from Stampendous and the sentiment is a stamp from the Everyday add ons stamp set from Elzybells.

IMAGE: Changito spring from Stampendous, Every add ons from Elzybells
PAPER: So Saffron and Ruby red from Stampin Up and The paper studio dp
INK: Versafine onyx black
ACCESSORIES: Derwent pencils, black glaze pen, So saffron twill ribbon from Stampin up, circle nestabilities.

Tuesday 20 July 2010

Tiddly Inks 14 - Sketch challenge en sneak peek


Goedemorgen allemaal, vandaag zijn we toe aan de 14e Tiddly Inks challenge en deze week hebben we een sketch challenge voor jullie. Volgens mij heeft Betty deze geweldige sketch gemaakt en hij was erg prettig om mee te werken. Ik heb al eerder op mijn blog geschreven over de Tiddly inks Halloween in July bloghop geschreven en aangezien ik daarvoor meerdere halloween kaartjes heb gemaakt, heb ik besloten nog even in de Halloween sfeer te blijven met het lieve heksje Higgelty die hier te krijgen is in de Tiddly Inks shop. Ik heb Higglty ingekleurd met derwent en koh-i-noor potloden en daarna heb ik haar uitgeknipt. Haar ogen zijn gekleurd met een zwarte glaze pen en met een zwarte fineliner heb ik alle oranje vlakken op haar kleren voorzien van een patroontje. Op haar toverstaf heb ik wat stickles gedaan. Voor de achtergrond van de kaart heb ik zwart-wit gestipt papier gebruikt. Uit een vel oranje papier heb ik cirkel gesneden en deze heb ik geëmbost met de divine swirl embossing folder van cuttlebug. Langs de onderrand van het oranje papier heb ik geponst met de scallop sentiment punch van Fiskars. Langs de randen heb ik een stiklijntje gedoodled met een zwarte fineliner en daar bovenop is een een zwarte strip papier geplakt. Daar weer bovenop is de bezemsteel van Higgelty geplakt.

Goodmorning everyone, today we have the 14th Tiddly Inks challenge for you and this week we have a sketch challenge for you. I think it was Betty who designed the sketch and it was lovely to work with! I have written before on my blog about the Tiddly Inks Halloween in July bloghop and I had to make a couple of halloween cards for the hop this thursday. It was a lot of fun, so I decided to use the sketch for another halloween card with the very cute witch Higgelty which you can find here in the Tiddly Inks shop. I have coloured Higgelty with derwent and koh-i-noor pencils and then I cut her out. I used a black glaze pen to colour her eyes and I used a black fineliner to create all the different patterns on the orange parts of her clothes. I added stickles to the top of her wand. As a background for my card I used black and white dotted paper. I cut a circle out of a piece of orange paper and embossed it with the divine swirl embossing folder from cuttlebug. I ounched the strip of orange paper with the scallop sentiment punch from fiskars. I doodled a stitched line with a black fineliner and added a strip of black paper and on top of that I added Higgelty's broom.

Dit is nog een sneak peek van één van mijn kaarten die ik voor de bloghop van aanstaande donderdag heb gemaaakt. Iedereen kan meedoen aan de bloghop en er zijn leuke prijzen te winnen Alle details staan op de Tiddly Inks challenge blog. Sinds gisteren zijn alle nieuwe halloween afbeeldingen te koop in de Tiddly Inks shop en dan is er ook nog een leuke actie in de shop, want je krijgt bij besteding van 15 euro 35% korting en bovendien zijn de halloween afbeeldingen nog extra afgeprijsd!

This is another sneak peek of one of the cards that I made for this thursday's halloween bloghop. Everyone can participate and there great prices. You can find all the details on the Tiddly Inks challenge blog. Since yesterday the new halloween images are for sale at the Tiddly Inks shop and you can get them with a nice discount, because when you spend 15 dollars in the shop you will get a discount of 35%!

IMAGE: Higgelty from Tiddly Inks
PAPER: Black and white dotted paper, orange cs from stash
ACCESSORIES: Derwent and koh-i-noor pencils, black glaze pen, black fineliner, circle nestabilities, divine swirl embossingfolder from cuttlebug, stickles

Monday 19 July 2010

Pollycraft - Flash those freebies and CAS76 - Sketch


Goedemiddag allemaal. Vanmiddag heb ik dit kaartje gemaakt voor 2 challenges. Bij Pollycraft hebben ze een challenge om een kaartje te maken met één van hun freebies. Iedere vrijdag posten ze weer een nieuwe. De andere challenge is de CAS challenge op Splitcoaststampers en daar hebben ze deze week een sketch. De afbeelding van Pollycraft die ik heb gebruikt is New home en die heb ik ingekleurd met mijn potloden. Daarna heb ik de afbeelding uitgeknipt. Ik heb een heel klein basiskaartje genomen van 10 bij 10 cm. Met de vierkante nestabilities heb ik de rode en witte vierkant uitgesneden. De witte voerkant is geëmbost met de swiss dots embossing folder van cuttlebug. Hieroverheen heb ik een rode strip papier geplakt waarop ik de tekst new home heb geplakt met sticker letters.

Hi everyone. I made this card today for 2 challenges. At Pollycraft they want you to make a card with one of their freebie images. Every friday a new one is posted, so there are plenty. The other challenge is the CAS challenge on Splitcoaststampers and this week they have a lovely sketch. The image I used from Pollycraft is New home and I coloured it with my pencils. Then I cut the image out. The size of the card that I made is 4 by 4 inch. I used the square nestabilities to cut out the red and white square. The white square was embossed with the swiss dots embossing folder from cuttlebug. I added a strip of red paper and used letter peel offs to create the sentiment.

IMAGE: New home from Pollycraft
CS: REd and white cs
ACCESSORIES: Pencils, letter peel offs.

Saturday 17 July 2010

Tiddly inks zomerkaartje en halloween sneak peek


Hallo! Dit kaartje heb ik afgelopen week al gemaakt en is wel toepasselijk voor het weer van de afgelopen weken. De afbeelding Muddy adventures is van Tiddly Inks en zoals altijd heb ik hem ingekleurd met derwent potloden. Rondom de afbeelding heb ik gekleurd met blauwe en beige chalk. De tekst heb ik ook rechtstreeks op de kaart geprint. Ik had geen koordje in een leuk bijpassend kleurtje en daarom heb ik maar een stuk beige koord gekleurd met een bruine copic marker. De hoeken van de kaart zijn afgerond met de corner chomper. 

Hello! I made this card a week ago. The image I used is Muddy adventures from Tiddly Inks and as always I used my pencils to colour the image. I have used blue and beigechalks to colour around the image. I printed the sentiment on my card. I didn't have a cord in a matching colour, so I used a beige cord and I coloured that with a brown copic marker. I used the corner chomper to give my card round corners. 


Donderdag 22 juli is er weer een bloghop van Tiddly inks! Christy is druk aan het tekenen geweest en ze heeft een paar geweldige halloween afbeeldingen getekend en dus is het thema van de bloghop dan ook Halloween in july. Iedereen kan meedoen en er zijn leuke prijsjes te winnen, zoals waardebonnen voor de Tiddly Inks shop en ...... een guestdesigner plekje voor augustus!!! Alle details staan op de Tiddly Inks challenge blog.

Thursday 22 july we are having a Tiddly inks bloghop! Christy has been working really hard to create some awesome new halloween images and the theme of the bloghop will be Halloween in july! Everyone can participate and there are a lot of great prices, like coupons for the Tiddly inks shop and .......a guest designer spot for the month of August at Tiddly inks!!! All the details are on the Tiddly inks challenge blog.


En dit is alvast een sneak peek van één van de nieuwe halloween afbeeldingen! :) Ze zijn te koop vanaf 19 juli in de Tiddly inks shop en er zal een leuke actie zijn, dus het is het perfecte moment om je slag te slaan!

And this is a sneak peek from one of the new halloween images! :) They will be for sale from the 19th of july in the Tiddly inks shop and there will be a nice sale!

IMAGE: Muddy adventures from Tiddly inks.
CS: Linen structure cs.
ACCESSORIES: Derwent pencils, chalk, black glaze pen, cord, brown copic marker

Friday 16 July 2010

DU2DS 42 - Stitching


Goedemorgen allemaal! Er zijn alweer 2 weken voorbij sinds de laatste DU2DS challenge en dus hebben we vandaag weer een nieuwe challenge. Deze keer willen we graag zien dat jullie ergens op de kaart stikken. Het stikken mag echt zijn met naald en draad, maar ook een getekend stiklijntje is goed. Mijn collega's uit het design team hebben ook allemaal geweldige creaties gemaakt, dus hopelijk kom je ook nog even kijken op het Dare U 2 Digi stamp challenge blog.

Ik heb ervoor gekozen om nu eens echt met naald en draad aan de slag te gaan en wow dat was wel even een werkje. :) Ik heb voor mijn kaart het mooie whipped cream cardstock van Elzybells gebruikt. Ik heb de geweldige afbeelding Poppies van Chris Dark (Sketchingstamper) op de kaart zelf geprint en daarna ingekleurd met mijn potloden. Ik heb in word een tekstcirkel gemaakt en deze heb ik met de hand uitgeknipt langs de randen. Daarna heb ik langs de randen met naald en draad een stiklijntje gemaakt. Onder deze cirkel heb ik nog een cirkel geplakt die ik heb uitgesneden uit het strawberry fool cardstock van Elzybells. Het lijkt op de foto alsof hij scheef zit, maar dat is in het echt niet zo. ;)

Goodmorning everyone! Two weeks already past and that means it is time for a new challenge from DU2DS. This time we would love to see stitching somewhere on your card. It can be real stitching with needle and thread or faux stitching with a fineliner. My colleagues from the design team have made some fabulous cards, so please pop over to the Dare U 2 Digi Stamp challenge blog.

I decided to use a real thread and needle to create the stitching on my card and wow what a job it was. :) I have used the gorgeous whipped cream cardstock for my card. I printed the amazing image Poppies from Chris Dark (sketching stamper) on the card and coloured it with my pencils. I created a text circle in word with the sentiment (happy birthday) and I cut it out. With needle and thread I created the stitching on the edges of the circle. I added another circle that I cut out of strawberry fool cardstock from Elzybells and placed it under the circle with the sentiment. . On the picture ot looks like the pink circle wasn't places straight under the other circle , but in real like it is good. :)

IMAGE: Poppies from Sketchingstamper - Chris Dark
PAPER: Whipped cream and strawberry fool cardstock from Elzybells
ACCESSORIES: Pencils, thread, circle cutter.

Thursday 15 July 2010

Softpencil - Frog house en Friday sketchers


Goedemiddag! Vandaag is het donderdag en dat betekent dat ik weer een kaartje van Softpencil voor jullie heb. Deze week moesten we een kaart maken met de afbeelding Frog house. Ik heb de afbeelding gekleurd met derwent potloden en de ogen van de kikker heb ik gekleurd met een zwarte glaze pen. De afbeelding heb ik uitgesneden met de vierkante nestabilities. Voor de achtergrond heb ik een groen vel Core'dinations papier genomen en dat heb ik geëmbost met de polka dots embossing folder van quickutz en daarna heb ik de stippen geschuurd met een nagelvijl. Ik ben ook langs de randen gegaan met de nagelvijl. Midden op de kaart heb ik een rand geplakt met groen streepjespapier. Van zwart lint heb ik een strikje gemaakt. De tekst is een stempel die uit een stempelsetje van Eline Pellinkhof komt. De sketch die heb gebruikt is van de Friday sketchers.

Hello! Today it is thursday and that means that I am posting a new Softpencil card. This week the design team had to make a card with the image Frog house. I have coloured the image with derwent pencils and the eyes of the frog were coloured with a black glaze pen. The image was cut out with the square nestabilities. I used a green sheet of Core'dinations paper for the background I embossed it with the polka dots embossing folder from quickutz. I went over it with a nail-file to sand the dots. I also used the nail-file on the edges of the green paper. I added a strip of green striped paper in the middle of the card and made a bow from black satin ribbon. The sentiment is a stamp from a stamp set from Eline Pellinkhof and it means something like get well. The sketch I used is from the Friday sketchers.

IMAGE: Frog house from Softpencil, EC0113 from Marianne Design.
PAPER: Core'dinations paper, black papicolor
INK: Versafine onyx black
ACCESSORIES: Derwent pencils, black glaze pen, square nestabilities, polka dots embossing folder from quickutz, black ribbon.

Tuesday 13 July 2010

Tiddly Inks 013 - Match it up!


Goedmorgen! We zijn alweer toe aan een nieuwe challenge van Tiddly Inks en deze is het de bedoeling om je afbeelding aan te passen aan de kleuren van je design papier. Ik heb mijn kaartje zondagochtend gemaakt zoals te zien is aan de kleuren LOL. Nou ja vandaag is de huldiging dus het kleurtje oranje kan nog steeds. :) Ik heb weer eens mijn favoriete buggje uit de Tiddly Inks shop gebruikt: Send me a sign bug. Ik heb de afbeelding gekleurd en daarna heb ik het jurkje en mutsje nog eens op het design papier geprint en daarna heb ik de afbeelding gepaperpiect (aangekleed met design papier) Het oranje papier is een digitale download van Pink Petticoat. Langs de randen heb ik een stiklijntje getekend met een zwarte fineliner. De cirkel heb ik uitgesneden met de ronde nestabilities en daarna heb ik de witte cirkel geëmbost met de snowflakes embossing folder van cuttlebug.

Goodmorning everyone! It is tuesday and we have a new challenge from Tiddly inks and this week we want you to use matching colours for your image and design paper. I made my card sunday morning before the final of the world cup and I still had hope. LOL Again I used my favorite buggie from the Tiddly Inks shop: Send me a sign bug. I have coloured the image and printed the dress and hat on the orange design paper and then I paperpieced the image. The orange paper is a digital download from Pink Petticoat. I have drawn a faux stitching line on the edges of the design paper. The circle was cut out with my nestabilities and I embossed it with the snowflakes embossing folder from cuttlebug.

IMAGE: Send me a sign bugg from Tiddly Inks
PAPER: Daisy bouquet from Pink Petticoat, black papicolor
ACCESSORIES: Derwent pencils, black glaze pen, circle nestabilities, blue chalk, snowflakes embossing folder from cuttlebug, black fineliner, white ribbon.

Friday 9 July 2010

Tasha

Hoi hoi! Vandaag laat ik een kaartje zien dat ik afgelopen week heb gemaakt. Mijn tante vroeg me een kaartje te maken met de kleuren fel rose, zwart en wit en dit is het resultaat geworden. De afbeelding die ik heb gebruikt is Tasha van Mo Manning, ik moet altijd grinniken als ik dit boze meisje zie. :) Ik heb Tasha ingekleurd met derwent potloden. Op het rose doodlebug cardstock heb ik gestempeld met een klein stempeltje van Elzybells. Het zwarte vlak is geëmbost met de swiss dots embossing folder van cuttlebug. Van zwart-wit geruit lint heb ik een strikje gemaakt. De bloem is gemaakt met de floral punches van Nellie Snellen. In het hartje heb ik een zwart hotfix steentje geplakt en op de bloem heb ik gespoten met pearl glimmermist.

Hello, Today I am showing you a card that I made this week. My aunt asked me to make a card with the colours pink, black and white and this is the result. The image I used is Tasha from Mo Manning and I always laugh when I see this little angry girl. :) I have coloured Tasha with derwent pencils. On the pink doodlebug paper I stamped with the little flower stamp from Elzybells. The black paper is embossed with the swiss dots embossing folder from cuttlebug. I made a little bow from black and white gingham ribbon. The flower was made with the floral punches from Nellie Snellen. In the heart I added a black hotfix stone and I sprayed on it with pearl glimmermist.


IMAGE: Two tasha from Mo Manning, Sheep celebrations 1 from Elzybells
CS: Pink doodlebug, black linen cs.
INK: Versafine onyx black
ACCESSORIES: Derwent pencils, black fineliner, swiss dots embossing folder, floral punches from Nellie Snellen, black and white gingham ribbon, pearl glimmermist, hotfix.

Thursday 8 July 2010

Softpencil - Happy birthday (digi sentiment)


Hallo! Het is weer donderdag en dat betekent dat het weer tijd is voor Softpencil. Deze week moest het design team iets maken met het Happy birthday digi sentiment. Ik heb ervoor gekozen om een doosje te maken met een label. Het doosje is gemaakt van rose doodlebug cardstock en de deksel is versierd met doodlebug stippenpapier. De afbeelding die ik op het doosje heb gebruikt is Ratiny in a cupcake en het is een freebie die hier te krijgen is. Ik heb de afbeelding ingekleurd met derwent potloden en de oogjes van Ratiny zijn gekleurd met een zwarte glaze pen. Ik heb de afbeelding uitgesneden met de ronde nestabilities en langs de rand heb ik gedoodled met een zwarte fineliner.

Hello! It is thursday and that means it is time for Softpencil. This week the design team had to make something with the Happy birthday digi sentiment. I have chosen to make a box with a label. I made the box from pink doodlebug paper and I decorated the box with dotted doodlebug paper. The image I used is Ratiny in a cupcake and it is a freebie that you can get here. I have coloured the image with derwent pencils and I coloured Ratiny's eyes with a black glaze pen. I have cut the image out with the circle nestabilities and I doodled around the image with a black fineliner.


Ik heb de Happy birthday digi sentiment verkleind en daarna geprint. Ik heb de afbeelding gekleurd en op een stukje rose doodlebug cardstock geplakt, dat ik in de vorm van een label heb gesneden. Voorin het label heb ik met een tang 2 gaatjes gemaakt en het label zit met een klein strikje van wit satijn lint vast aan het doosje.

I have resized the digi sentiment Happy birthday and then I printed it. I coloured it with my pencils and then I attached it on a piece of pink doodlebug paper. I made 2 holes in the front of the label and I attached the tag to the box with a little bow from white satin ribbon.


IMAGE: Ratiny in a cupcake and Happy birthday digi sentiment from Softpencil
PAPER: Pink doodlebug and spinkles dp from Doodlebug
ACCESSOIRES: Derwent pencils, black glaze pen, black fineliner, circle nestabilities, white satin ribbon

Wednesday 7 July 2010

Hobbyzine met Tiddlyinks


Goedemorgen allemaal! Zo is iedereen weer bijgekomen na gisteravond? Wat was het spannend he! En dan nu maar afwachten hoe het zondag gaat!
Vandaag heb ik een kaartje uit de nieuwe Hobbyzine. Afgelopen dinsdag is hij verschenen en oh wat gaaf ziet hij er uit! Ik was dan ook heel erg blij dat ik gevraagd ben om mee te werken aan dit nummer. Het was de bedoeling dat deze keer kleine accesoires worden gebruikt op de kaarten. Op deze kaart heb ik ervoor gekozen om met pailetten te werken. De afbeelding die ik heb gebruikt is Bo van Tiddly Inks en die is hier te krijgen als freebie! Ik heb Bo ingekleurd met potloden en de ogen en neus heb ik gekleurd met de zwarte glaze pen. De ballonnen heb ik eerst ingekleurd met potloden en daarna heb ik er glitter overheen gestrooid. Ik heb de afbeelding uitgeknipt. Met de nestabilities heb ik 2 grote cirkels uitgesneden en op de witte cirkel heb ik pailletten van Doodlebug geplakt om er zo een leuke achtergrond mee te maken. Ik heb op een stuk rose bubblegum cardstock van Doodlebug de zwarte stippenachtergrond geprint.Over de cirkel heb ik een strip zwart bazzil bling papier geplakt. Aan de onderkant heb ik met een pons de scallop rand geponst. Ik heb de tekst met het Olivia alfabet van quickutz gemaakt. Hierop heb ik met een witte gelpen accenten aangebracht.
Goodmorning! Last night the Dutch orange soccer team played the semi final for the world cup, so it was a real exciting evening. They won and this sunday they will play the final! Woot woot! :)

Today I am posting this card that was publiced in the new Hobbyzine (a Dutch magazine). On tuesday I received my copy of the magazine and  magazine looks fabulous! I was asked to make 2 cards for this magazine. This time the magazine is all about the little accessories. I have used sequins on my card to create a background. The image I used on my card is Bo from Tiddly inks and you can get her here, and she is a freebie! :) I have coloured Bo with derwent pencils and I coloured her eyes and nose with a black glaze pen. The balloons were first coloured and then I sprinkled glitter on them. I have cut the image out. I made the 2 circles with the nestabilities and on top of the white circle I created the background with doodlebug sequins. I printed black dots on a piece of pink bubblegum doodlebug paper. I added a strip of black bazzil paper. The edge was punched to create a scallop border. I made the sentiment (congrats) with the Olvia alphabet from quickutz. I used a white gelpen to draw some accents on the letters.

CS: Doodlebug bubblegum cs, black bazzil bling, white cs from Action.
ACCESSORIES: Derwent pencils, black glaze pen, white gelpen, doodlebug sequins, circle nestabilities, scallop sentiment punch from Fiskars, Olivia alphabet from Quickutz, glitter.

Tuesday 6 July 2010

Tiddly Inks 12 - Summer card


Goedemorgen! Vandaag hebben we weer een nieuwe Tiddly Inks challenge en deze week moeten we een zomerkaartje maken. Ik vond deze afbeelding Going swimming dan ook perfect voor mijn kaartje van deze week. Ik heb de afbeelding geprint op linnen papier en daarna heb ik hem ingekleurd met derwent potloden. De ogen van het meisje zijn gekleurd met een zwarte glaze pen. Ik heb de afbeelding uitgesneden met de ronde nestabilities en daar onder zit een een witte scallop cirkel. Op deze cirkel heb ik met een blauwe fineliner een stiklijntje getekend. Ook op het blauwe karton heb ik met een witte gelpen een stiklijntje langs de rand getekend. De cirkels zijn gemaakt met ponsjes en daarna heb ik ze geëmbost met de swiss dots embossing folder!

Goodmorning! Today we have a new Tiddly Inks challenge and this week we have to make a summercard. I thought this image Going swimming was perfect for my card this week. I printed my image on linen paper and then I coloured it with derwent pencils. The eyes of the girl are coloured with a black glaze pen. I have cut the image out with the circle nestabilities and I added a white scalloped circle under it. I made a faux stitching line on it with a blue fineliner. I also added a faux stitching line on the blue cardstock. The circles were made with punches and I embossed them with the swiss dots embossing folder from cuttlebug!

En voor vanavond:  :)

Hup Holland hup!!!


And for tonight: :)

Go Holland!!!

CS: Co'ordinations cs, white cs
ACCESSORIES: Derwent pencils, black glaze pen, white gelpen, blue fineliner, swiss dots embossing folder.

Sunday 4 July 2010

Tiddly Inks tutorial met cookiebugg

Hoi hoi, dit is een klein cadeau setje dat ik de afgelopen week heb gemaakt (het doosje hebben jullie al vaker gezien) en nu heb ik de beschrijving van het doosje op het Tiddly Inks challenge blog gezet. Dus als je zelf ook eens zo'n doosje wil maken ga er dan vooral even kijken op het challenge blog! :)

Hello, this is a little giftset that I made this week (you have seen this little box before with another design) and I made a tutorial of how to make the box that I posted on the Tiddly Inks challenge blog. So if you want to make a box like this yourself go take a look at the challenge blog! :)


Ik heb voor mijn setje de geweldige lieve cookie bugg gebruikt. De kleine koekjes die op het deksel van het doosje staan komen uit een setje met accesoires voor cookie bugg. Deze laatste was een freebie voor de Tiddly inks groep op Papercraft planet. Iedere week plaatst Christy daar een freebie, dus het is de moeite waard om lid te worden! Ik heb beide afbeeldingen in het bruin geprint zodat ze perfect bij het bruine chocolate brownie cardstock van Elzybells passen. 

I have used the supercute cookie bugg image from Tiddly inks for my little giftset. The cookies that were used on the box are from a accessory set for cookie bugg, that was a freebie in the Tiddly Inks group on Papercraft planet. Every tuesday Christy posts a freebie over there, so come on and join us in the Tiddly inks group! I have printed the image and the cookies with brown ink, so they match the chocolate brownie cardstock from Elzybells.


Boven op het doosje heb ik een klein strikje van bruin satijn lint geplakt.

I have a placed a little bow that I made from satin brown ribbon on top of the cover of the box.


Binnenin het doosje heb ik 4 zakjes thee gestopt en een zakje waarin 3 kleine chocolate chip cookies zitten.

Inside the box I have placed 4 bags of tea and a little bag with 3 chocolate chip cookies.


Van restjes karton heb ik een bijpassend kaartje gemaakt voor bij mijn doosje. Het formaat van het kaartje is 8,5 bij 8,5 cm. Het ruitjespapier is een download van Pink petticoat (little check in de kleur milk chocolate) en dat heb ik gemat op het bruine cs van Elzybells. Hieroverheen heb ik een stukje lint geplakt en daarop zit een klein strikje. Ik heb met een witte gelpen stiklijntjes getekend op de vlakken die onder cookiebugg geplakt zijn.

I made a little matching card from leftovers from the cardstock. The size of the card is 8,5 by 8,5 cm). The check paper is a digital download from Pink petticoat (Little checks, the colour is milk chocoalte) and I placed it on the chocolate brownie cs from Elzybells. I added a little piece of brown ribbon and a tiny bow. I used a white gelpen to drawn the faux stitching on the pieces of cardstock under the image.


Dit is het zakje met de koekjes. Het zakje sluit met een bruin lintje. Ik heb nog één apart koekje geprint en ook de tekst die te vinden is in de cookie bugg accessoires set en ik heb met een tang een gaatje in beide gemaakt. Ik heb ze daarna aan de uiteinden van de strik bevestigd.

This is the bag with cookies. The bag closes with brown ribbon. I printed another cookie and the sentiment and made a little hole oin both of them. In attached them both on the ends of the bow on the bag.

IMAGE: Cookie bugg and cookie extras from Tiddly inks, dots stamp from Rubber stamp tapestry.
PAPER: Whipped cream and chocolate brownie cs from Elzybells, little checks from Pink Petticoat.
INK: Chocolate brownie ink from Elzybells.
ACCESSORIES: Brown ribbon, white gelpen

LinkWithin

Related Posts with Thumbnails